header About Videos Categories Facebook Pintrest Contact Home

Wednesday, July 20, 2011

My Pink Stamper Design Team

It's that wonderful time again! Robyn, from My Pink Stamper, is looking for design team members! I would love to be a part of her design team. Robyn is such an inspiration and she is the reason I started crafting. It was after I stumbled upon her videos that I decided to buy a Cricut and start crafting! I hope that through my blog I can teach people what I learn and inspire them the way Robyn inspired me! This is the second time I am trying out for the design team, and I have learned so much more then the December try outs.
Let me show you what I have created for this challenge. Our instructions were to use: orange, turquoise, green, brown and another optional color of your choice (of course I choose pink!)


Materials used:
- Colorbök yellow card stock
-Pink ribbon from Michael’s
-Twine from The Twinery (Lemondrop and Pink Sorbet)
-My Pink Stamper's Simply Sweet Occasion stamp set.
-Cupcake cup 1 and 3 from Cricut's Sweet Treats
-DCWV All About Girls Matt Stack
-White gel pen
-Glitter glue from Micheal’s $1 bin.

Instructions:
First I decided to cut the card base at 6 inches by 9 inches. I then creased it in the middle 
After that I cut the stripe background from the All about Girls Matt Stack at 4.5 inches by 3.5 inches. 
I attached the pink ribbon using Robyn's "cheater method" and then placed a small piece of polka dot paper (all from the All About Girls stack) over it, this was cut to about 1.5 inches by 4.5 inches 
After that I tied some twine around the ribbon and left it in a knot. 
I stamped the "My Sweet One" stamp from Simply Sweet Occasions on a small piece of turquoise paper and added some stitching around. 
I cut the first cupcake at 2.5 inches and the second cupcake at 2 inches. I used glitter glue to embellish them and my zig glue pen to assemble them. 


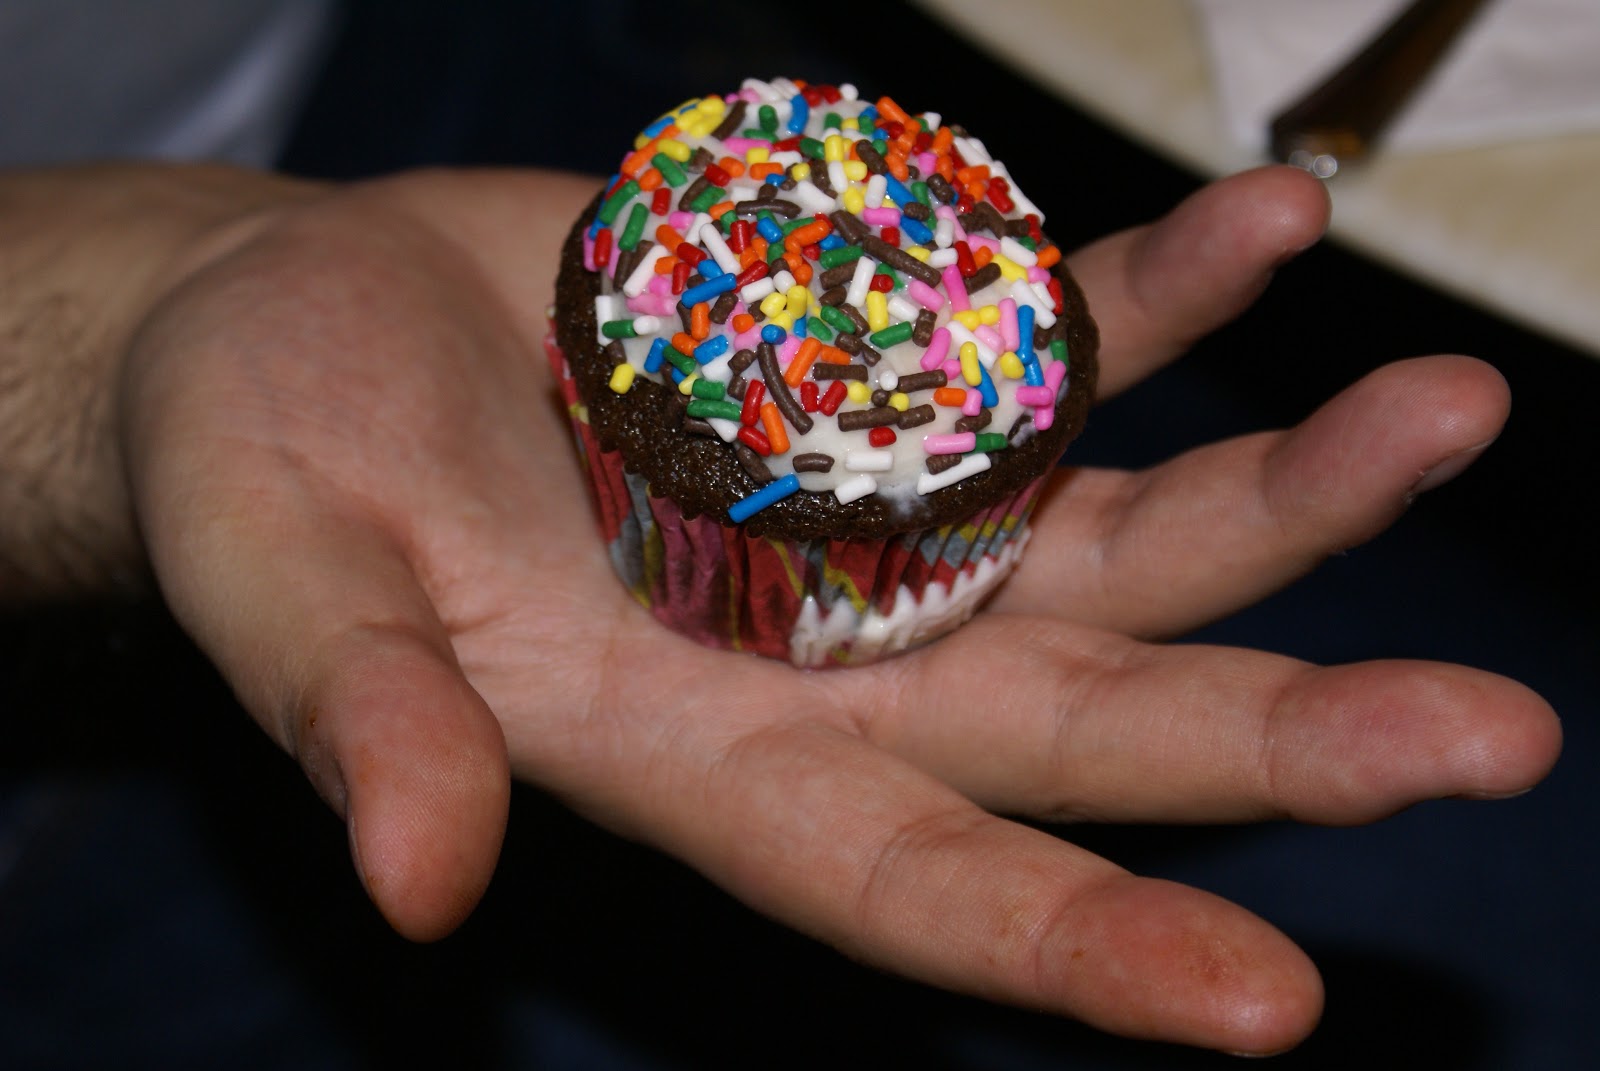
That’s not it! I also decided to make some very yummy PINK velvet cupcakes in honor of this wonderful occasion. I made these while babysitting my 5 year old cousin, she enjoyed getting to make pink cupcakes! We found the recipe in a book she gave me for my graduation. It's called Tina Cocolina, she got it for me because she knows how much I LOVE CUPCAKES! Anyways, the recipe was for red velvet cupcakes, but we decided to put pink food coloring instead. If you want to buy this book go here.

As for the recipe, you'll need to read the book to find out! I will provide you with another recipe I used to create more pink velvet cupcakes the next day. We had around 50 mini cupcakes. I brought them to work the next day so they would not go to waste and not a single one was left over! Here is the recipe for the second batch I prepared:


Recipe courtesy of Taste of Home
Ingredients
1 cup butter, softened 
1-1/4 cups sugar 
1/8 teaspoon pink paste food coloring 
3 eggs 
1 teaspoon vanilla extract 
2-1/2 cups all-purpose flour 
1-1/2 teaspoons baking powder 
1/4 teaspoon baking soda 
1/4 teaspoon salt 
1 cup buttermilk

Directions
In a large bowl, cream the butter, sugar and food coloring until light and fluffy. Add eggs, one at a time, beating well after each addition. Beat in vanilla. Combine the flour, baking powder, baking soda and salt; add to creamed mixture alternately with buttermilk beating well after each addition.
Fill paper-lined muffin cups two-thirds full. Bake at 350° for 23-27 minutes or until a toothpick inserted near the center comes out clean. Cool for 10 minutes before removing from pans to wire racks to cool completely.
Meanwhile, place white chips in a small bowl. In a small saucepan, bring cream just to a boil. Pour over chips; whisk until smooth. Stir in butter. Transfer to a large bowl. Chill for 30 minutes, stirring once.
Beat on high for 2-3 minutes or until soft peaks form and frosting is light and fluffy. Cut a small hole in the corner of a pastry or plastic bag; insert #30 star tip. Fill bag with frosting; frost cupcakes. Sprinkle with coarse sugar and edible glitter. Store in the refrigerator.
Directions
In a large bowl, cream the butter, sugar and food coloring until light and fluffy. Add eggs, one at a time, beating well after each addition. Beat in vanilla. Combine the flour, baking powder, baking soda and salt; add to creamed mixture alternately with buttermilk beating well after each addition.
Fill paper-lined muffin cups two-thirds full. Bake at 350° for 23-27 minutes or until a toothpick inserted near the center comes out clean. Cool for 10 minutes before removing from pans to wire racks to cool completely.
Meanwhile, place white chips in a small bowl. In a small saucepan, bring cream just to a boil. Pour over chips; whisk until smooth. Stir in butter. Transfer to a large bowl. Chill for 30 minutes, stirring once.
Beat on high for 2-3 minutes or until soft peaks form and frosting is light and fluffy. Cut a small hole in the corner of a pastry or plastic bag; insert #30 star tip. Fill bag with frosting; frost cupcakes. Sprinkle with coarse sugar and edible glitter. Store in the refrigerator.


NOTE: I used my new mini cupcake maker. I placed about a tablespoon of batter in the mini cupcake tins and cooked them for about 8-10 minutes. The mini cupcake maker looks like a panini press, I purchased mine at Macy’s.

Friday, June 24, 2011

Baking Blog Hop

Hello, Thanks so much for joining us on the first baking blog hop, I had so much fun planing my first blog hop. Please visit each blog and view their project. Anyone who visits each blog and comments on each blog has a chance to win some great prizes!

First I want to explain the blog hop, all of the designers were required to create projects that included crafting and baking!


Here is my first project, I purchased pots from Michael’s and filled them with tissue paper then I made yummy brownies and baked them in flower baking cups. I frosted them in pink icing and placed them in the pot so that they looked like flowers. I got butterfly cupcake toppers from Michael’s and put them in the pot. How cute! I made this one for my cousin so I wrote her name on it with a paint pen.
The Recipe for the brownies can be found here


For my second project I created an accordion booklet. I learned to make it by watching My Pink Stamper's Video. For futher instructions you can watch it here. I used three sheets or paper, some ribbon, letter stickers and a cupcake sticker.


So, I have two wonderful giveaways. The first, is a stamp set that was donated by Robyn from My Pink Stamper, she is giving away the Sweetest Cupcakes set. If you want to purchase any of her stamps you should visit her site, she has so much wonderful content!


The second giveaway is the recipes booklet I made with a small secret surprise! If you want to win either you must comment on this post leaving me an email address. As always, I love it when people become followers but it's not necessary. Please comment on the other blogs in the hop, here is the lineup:
1. Jessica
2. Sarah
3. Wendy
4. Barb
5. Maria
6. Jen
7. Dana

At the end, when you have visited each blog, you can upload your project! I will randomly draw a third winner for another wonderful prize. The challenge is to create a project using baking and crafting. You have until Monday June 26th at 8:00 pm est.

Thursday, May 26, 2011

Winner

Sorry I did not post this earlier but I randomly picked a winner for the crochet flowers from the last blog hop.
The winner is xxsquigglesxx, I've contacted her, please get back to me soon!

Friday, May 6, 2011

Happy Birthday Jenny!

Hello, welcome to your second to last stop for Jenny's Big 3-Oh blog hop. you should be coming here from Jamie, but if you were not hoping around go back to Jenny's blog to start from the beginning. Scince Mother's Day is this Sunday I decided to create a cute Mother's Day card for my mommy!
For this card I used 
-Raspberry Fizz paper from Papertrey Ink
-Patterned paper from AC Moore
-Some scrap ribbon I had, it's sheer.
-A stamp from Papertrey Ink
-Flower cut from SweetTreats cartridge
-White Gel pen
-LOTS OF BLING!

The card was cut at the standard A2 size car 8.5X5.5, then the patterned paper was cut at 3.5X4.5 and another smaller strip for the sentiment. I used a bright pink color to stamp on "mother" but it was to light, so I went over it with a white gel pen. The flower was cut from Sweet Treats at 3.5 (I think) and lots of pink rhinestones also from Papertrey Ink.

What blog hop would be complete with out some blog candy!?! I have these adorable crochet flowers. These were handmade from Rona Creations, a bag of 10 flowers will cost you $10. You will receive 11 pink and green flowers if you comment on this post. I love when people become followers although it is not necessary. If you win and you live outside of the U.S. I ask that you pay for the shipping, up to what I would pay. If you are interested in buying these flowers contact me and I will give the message to Rona's creations, you will get them at the discounted price of $7 if ordered from this blog hop! 

Your next stop is Elaine. Have fun!


Wednesday, May 4, 2011

Blog Hop Friday

This Friday I will be participating in a blog hop for Jenny over at PaperCut Creations. Tune in!

Friday, April 22, 2011

Ice cream cupcakes

This past Sunday was Palm Sunday and I had family visit so I decided to prepare a treat, I made ice cream cupcakes! If you want to learn how to bake the cupcakes click on the recipie below. Anyone who knows me knows I am obsessed with cupcake, I love making them, they are so cute! I was so happy to bake on Sunday because it was the first time I got to use my new cupcake apron! I purchased it from Flirty Aprons, after using a coupon it came to $30 with shipping.
 I hope you try to make these, they were really fun! I baked the cake part from scratch, Instead of using frosting I used frozen yogurt on top. I waited for it to melt a bit and placed it in a pastry bag and then acted as if I was applying frosting, it was very cold and still firm so it was a little hard to make a perfect swirl. As you can see, the frozen yogurt melts very quickly to they need to be eaten as soon as they are "frosted." The recipie for the cake came from cupcake 11 on this site, but I did not use the filling.


Friday, March 25, 2011

Winner

The winner of the blog candy from Jillian's music blog hope is LesleyfromWI
said...
Love the frame and how you decorated it. My favorite song at the moment is Secrets by OneRepublic. Love them!

I'll be emailing you later today to congratulate you, I need your address.

Friday, March 18, 2011

Music Blog Hop

I'm sorry for the delay of my posting! My grandmother just had surgery and I went to visit her in the Rehab center, thank you for your prayers! You should have hopped over here from Jillian's blog, if not go there to start the hop!

The song I chose is Girls Just Wanna Have fun, by Cyndi Lauper!


Today I'm showing a fun project! Watch the video (twords the end) to see the amazing blog candy!


I forgot to add the words "Girls Just Wanna Have fun" in a set of alphabet stamps from Hero Art.

To enter to win the Blog candy 
1) Comment on the post with a way for me to contact you if you are the lucky winner.
2) Let me know what your favorite song is!
3) You don't need to be a follower but I appreciate those who decide to follow! If you do not live in the States I ask that you pay for the shipping up to what I would pay.

Next you should hop over to Theresa's blog, and see the cute project she whipped up!

Sorry!

Hey guys,

This is Elena, Jessica's friend, and Jessica wanted to say sorry because she can not currently write her post for the Jillian's Blog Hop due to visiting her grandmother in the hospital.
However, she will make sure to do it tonight!

Thank you for your understanding. <3

Sunday, March 13, 2011

My Pink Stamper Challenge

Hello everyone! I hope everyone is doing well! I will have another video real soon! Until then, here is a card I made for the My Pink Stamper's Pinkalicious Blog Hop.

'

Recipe:
For the card base I used Stampin Up! Daffodil Delight I cut it's cut for an A2 size card. I then took a piece of Papertrey Ink's Raspberry Fizz paper for the background I used one of the Polka dot basics stamps and stamped the polka dot background using The matching Raspberry Fizz ink. I believe the Ribbon is from American Crafts and I used some Studio G glitter glue for the kite string. and finished it off with a rhinestone. To attach the kites I used 3D dots. I also used a sentiment from the Mega Mixed Messages stamp set made by Papertrey Ink.

Winners!

Hello everyone I'm going to post the winner to the card. Things have been a little hectic at home because my grandmother is in the hospital so please excuse my lateness! The winner is #3 xxsquigglesxx. I've emailed you!

Tuesday, March 1, 2011

Spring Hop

I'm so happy to be participating in my first blog hop, thank you Ashley! So, if you arrived here from the talented Teresa, then your in the right place! If not, then hop over to Ashley's blog to start.


I decided to create this cute card with a matching envelope


Recipie:

I took Blue paper from Micheal's and cut it at 5 1/2 by 8 1/2 and scored in half. This is a standered A2 size card which will fit in an A2 envelope. The patterned paper used for the background is from DCWV "All About Girls" that was cut at 4 1/2 by 3 1/2, I attached some pink and white polka dot ribbon from Offray Ribbon and then adhered this using my ATG gun. I cut  the chick from the Create a Critter cartridge, from page 53, cut at 2 3/4. I used a blue Prima Flower which I attached using a Glue Dott. For the chick's face I used  the PK-754 set from Peachy Keen Stamp. I stamped it using ink from Memories Direct. I drew stitching around the chick using my white Gelly Roll pen. I cut a pink circle using the Create a Critter, I believe I cut it from page 63, I pressed shift and then layer 2, this was cut at 2 3/4 The "Have a Tweet Easter" stamp is from Studio G I curved it so that it would fit around the circle twice. The little chick is also from this collection. I stamped the little chick and then cut around it and colored it with Le Plume II marker. 
BLOG CANDY
I'm going to send a random winner, chosen by random.org, this cute easter card. Just leave me a comment, and I'd love if you became a follower!


I hope you enjoyed this cute Easter card. Hope on over to Tracy's blog to see her project. 

Monday, February 28, 2011

Teen Week Winner

First off, I'm sorry for not porting this sooner, and not posting a video. Here is how the cake I made for my sister turned out. I ended up not using the fondant, It would not have been enough to cover the large cake. Instead, I used butter cream.

And now for the winner of my first giveaway, a package of Prima Flowers! Drum roll please.... The winner is Jenn. Jenn please email me your address!

Friday, February 25, 2011

Day Four of Teen Week

So, today I planned on show you something special, but I'm at work so I wont post what I'm doing until I get home around 3:00 est. My project is going to show you how I put fondant on a cake for the first time! I will also show how I made my sister's birthday invitations. So, check back to see all the fun. In the meantime I'm going to share the recipe I made for the cake. I started baking around 7:30 last night and did not finish untill 11:30! I needed to double the recipie for this huge cake, and even though it made a big mess and took a long time, not only to make but also to bake, the cake tastes SO GOOD! I was lucky that I had two people helping me! The recipe came from Martha Stewart. I doubled the recipe so that it would be enough to fit a bigger pan. When you double it it's going to be a lot of batter, so be prepared to have a huge mixing bowl. The batter comes out to be super fluffy!

Serves 10
  • 1 1/2 cups (3 sticks) unsalted butter, softened, plus more for pans
  • 3/4 cup unsweetened Dutch-process cocoa powder, plus more for pans
  • 1/2 cup boiling water
  • 3 cups sifted cake flour (not self-rising)
  • 1 teaspoon baking soda
  • 1/2 teaspoon salt
  • 2 1/4 cups sugar
  • 4 large eggs, lightly beaten
  • 1 tablespoon pure vanilla extract
  • 1 cup whole milk
  • Mrs. Milman's Chocolate Frosting

Directions

  1. Preheat oven to 350 degrees. Butter three 8-inch round cake pans. Line bottoms with parchment; butter parchment. Dust with cocoa powder; tap out excess. Set aside. Sift cocoa powder into a medium bowl; whisk in boiling water. Set aside to cool.
  2. Sift together flour, baking soda, and salt into a large bowl; set aside. Put butter into the bowl of an electric mixer fitted with the paddle attachment. Mix on low speed until creamy. Gradually mix in sugar until pale and fluffy, 3 to 4 minutes. Add eggs, a bit at a time, mixing well between each addition; mix until well blended. Mix in vanilla.
  3. Whisk milk into reserved cocoa mixture. With mixer on low speed, add flour mixture to butter mixture in 3 batches, alternating with the cocoa mixture.
  4. Divide batter evenly among prepared pans; smooth tops with an offset spatula. Bake, rotating pan halfway through, until a cake tester inserted into centers comes out clean, 35 to 45 minutes. Let cool in pans on wire racks 15 minutes. Turn out cakes onto racks; remove parchment and re-invert. Let cool completely.
  5. Using a serrated knife, trim tops of cakes to make level. Place four strips of parchment paper around perimeter of a serving plate or lazy Susan. Place the first layer on the cake plate. Spread the top of the first layer with 1 1/2 cups of frosting. Place the second layer on top and repeat process with another 1 1/2 cups of frosting. Place the remaining layer on top of the second layer, bottom side up. Spread entire cake with remaining 3 cups frosting.

Read more at Marthastewart.com: Moist Devil's Food Cake with Mrs. Milman's Chocolate Frosting - Martha Stewart Recipes

Thursday, February 24, 2011

Day three of Teen Week

Day three is here, I am super excited to introduce Jillian Vance, she is a great designer with a fabulous line of stamps, something I hope to produce really soon! Please remember to comment on every post for maximun chances to win Prima Flower blog candy. Isn't the Card adorable? Lets read what Jillian has to say:


Hi! I am Jillian, I have a blog, and my own line of stamps too!

Recipe:
K & Company paper
Glam Pink Stickles
Three Birds on Parade (2nd bird cut at 3 ½ inches)
Pink Sheer Ribbon from Hobby Lobby
A Jillian Vance Design Stamps “You’re SomeBUNNY Special”
Pacific Point Stampin’ Up! Ink Pad
How To:
Cut out your bird at 3 ½ inches,
Choose your paper (I chose this pretty Gingham paper from a GIANT stack I purchased, it is K & Company Brand, but you could use DCVW, or whatever kind of patterned paper you want.)
Glue your egg to your bird, just a little so they overlap.
Glue the bird to your paper
Stamp it
Use your ATG Gun or whatever to glue the paper to the card.
Apply Stickles on the ears and the egg.

Thanks so much! Thanks Jessica for wanting me to guest design.

Wednesday, February 23, 2011

Day Two of Teen Week

I'm so happy so many people are following! It makes me so happy! We have two more guests before I show you my fun project! Come check back to see me make a birthday cake! Remember to comment on each post for a better chance to win the blog candy.

So, for day of Teen Week we have Madison from Funky Cards teaching us how to make an amazing card, I need to try this! Here is what she had to say:


My name is Madison W.  I am the founder of Funky Cards.  I am a high school student and I started making and selling cards 14 months ago.  I hope to have a career in design one day.  I appreciate all that I have learned from the online crafting community.  I love sharing my ideas with my followers.  I would like you to consider following me:)

The card I created today is a waterfall card.  When you pull the bottom heart you expose four panels, one at a time.  This friendship card includes cutes little critters and the saying, "You will always be my best friend, you know to much."  If you want to know how to make a waterfall card you can watch a tutorial video by clicking HERE.


Thanks for letting me share my card with you:)  ~Madison

Monday, February 21, 2011

Day One of Teen Week

Welcome Tanner to the first day of Teen Week. Remember that anyone whom comments on the posts for the entire week will be entered for a chance to win some blog candy. I will be giving away Prima Flowers to a winner chosen at random. Please include your email or a way for me to contact you if you win. Please visit my guest designer's blogs, they're amazing! Please consider becoming a follower of not only my blog but also Tanner's!

Here's what Tanner has to say:
Ok I made this card using life as a beach cricut Cartridge. I used a butterfly from it. The card base is a A2 sized card (5 1/2 by 8 1/2) with blue stampin' Up! colored paper.Then, for the sentiment I used a My Pink Stamper stamp! Hope you enjoy this card! Special thanks the Jessica for wanting me to Guest design!


Teen Week

Hello Everyone!
This week I have some awesome guest designers for you. All of the comments for the entire week will be entered for a change to win some blog candy. The winner of a package of Beautiful Prima Flowers! Please stay tunned and comment on every post this week for extra chances of winning. I will conclude the guest designer week with a great project! So start commenting!

Friday, February 18, 2011

Updates and MPS love

It makes me so excited and honored when I send Robyn, My Pink Stamper, something and she shows it on her videos! I sent Robyn a cute penguin card and pink hot chocolate!
I adore Robyn! She's such an amazing and faithful person! Her videos have inspired me so much!

I'm going to be adding some stuff really soon and I'm applying to some design teams. I'm also participating in my first blog hop, organized by Jillian.

Next week, I have three awesome TEEN guest designers! and a great giveaway! Please come by for a chance to win!